

Before we Begin
- Ensure you have Node.js installed locally on your machine.
- Setup a google Developer Console account.
Configuring your google credentials
Head over to your Google API Dashboard

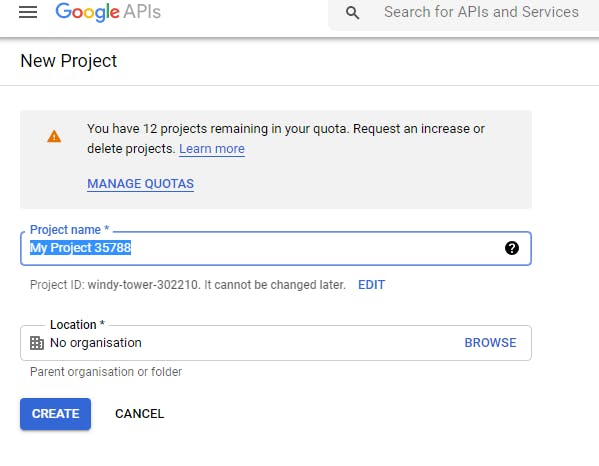
At the top navigation bar, click on Select a project. When the modal opens, click on New Project at the top right corner.
Give your project a meaningful name, then click create.
Once the project has been created, we need to configure the consent screen and app credentials.
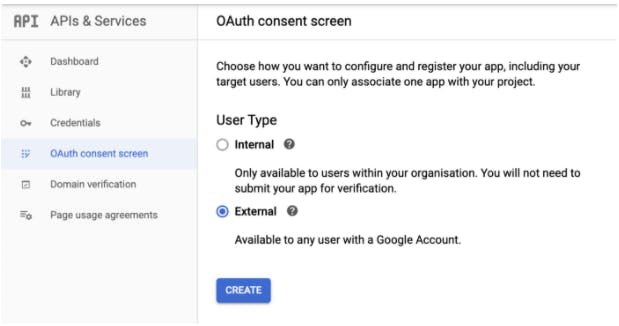
On the left navigation menu, select APIs & Services > OAuth consent screen.
For the User-Type, choosing External allows any user with a Google account to sign in to your application. Now click create.
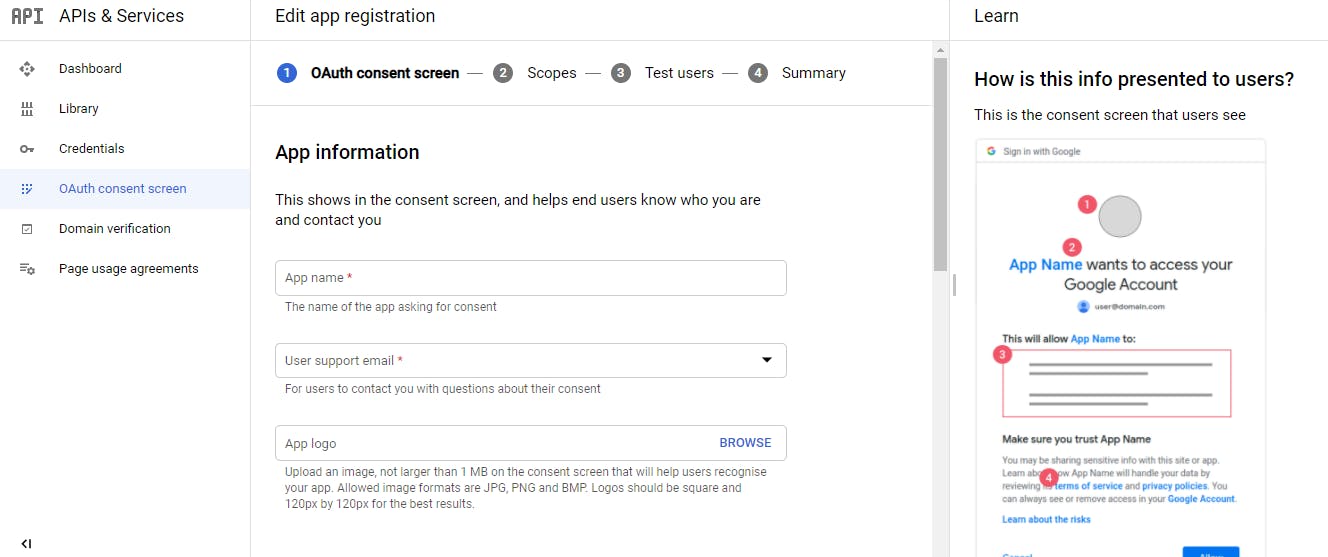
If you want to get things up and running quickly, add your App Name, select a User support email and provide a Developer contact information (Your Email), then click Save and continue. Continue to click Save and continue for Scope and Test Users, then at Summary, click Back to Dashboard.
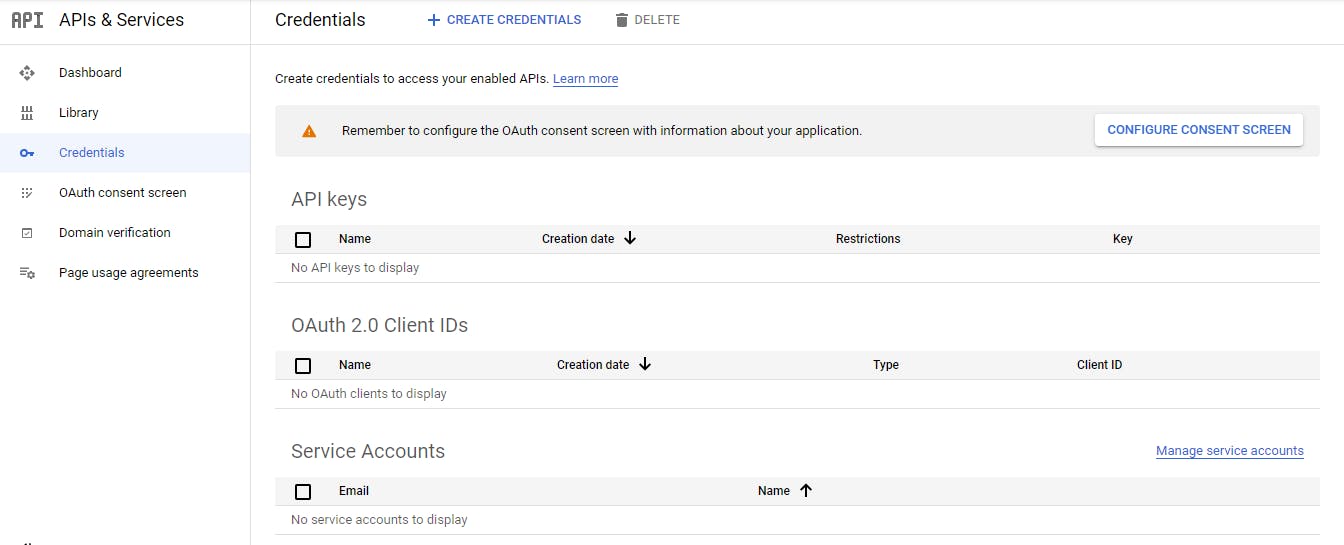
Once the consent screen has been created, from the side navigation, navigate to APIs & Services > Credentials
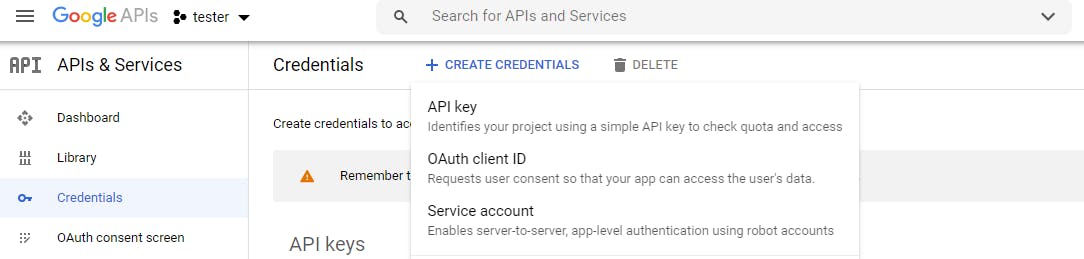
At the top bar, click Create Credentials. Select OAuth client ID.
To create the Client ID, we need to enter some information.
- Firstly, set application type to Web Application. (This can be any of the other options, depending on the client consuming your API.
- Give your client a suitable Name.
- Under Authorized JavaScript origins, you should enter the URL of your website. Since we are currently in development, we can use the localhost URL.
http://localhost:3000 - Set the redirect URL. This endpoint will be called when google finishes authenticating the user.
http://localhost:3000/api/auth/google/callback
As soon as you create the Client ID, you'll see a pop-up that tells you the Client ID and Client Secret.
Keep a note of these, as we'd use them later in our application. However, you can always go to your credentials screen, select the OAuth credentials created then view your keys.
Code Setup
This application uses Typescript, and I've tried to modularize the code to replicate its use in a real-world application.
In a directory of your choice, create a folder to house the application and navigate to it.
mkdir passport-google-oath
cd passport-google-oath
Initialize the project with npm.
npm init -y
Running npm init -y sets up our project and creates a package.json file for us.
Add nodemon to the project as a development dependency.
npm i nodemon -D
Using nodemon, our application is automatically refreshed every time we make a change to the code. This saves us a lot of development time and the hassle of restarting the server manually with every change we make.
Next, we install Typescript and the types for node.
npm i -D typescript @types/node
After installing Typescript, we add a tsconfig.json file to our applications root folder. Put the content from here into the tsconfig file.
Let us create a src file inside our project folder that will contain our project specific code.
mkdir src
Now let us add some scripts in our package.json file to start our server in development and production mode.
 "scripts": {
    "watch": "tsc -w",
    "dev": "nodemon dist/index.js",
    "start": "node dist/index.js"
  },
So what's going on in the above scripts here?
- The watch command
npm run watchconverts our typescript code to plain JavaScript and automatically places it in a new folder called dist. This allows us to run as close to production as possible and makes our code run faster in development. - The dev command
npm run devuses nodemon to starts our development server by running the compiled JavaScript code in our dist folder. - The start command
npm startruns our already compiled JavaScript code from the dist folder in production.
So to effectively start our server, we run npm run watch to compile our typescript code to JavaScript, then in a new terminal window, we run npm run dev to start our development server.
Add Google Credentials
We want to store our google keys inside the environment of our application. To make this easy we install a package called dotenv by running
npm i dotenv
Now create a file in the root of your application directory called .env We can add any secrets that we need for the application in this file.
PORT=3000
GOOGLE_CLIENT_ID='your-client-id'
GOOGLE_CLIENT_SECRET='your-client-secret'
GOOGLE_CALLBACK_URL='http://localhost:3000/api/auth/google/callback'
JWT_KEY='any-random-string'
Passport Setup
Passport is authentication middleware for Node.js. It provides over 500 authentication strategies, including Google, Facebook, and Twitter, to name a few.
Add passport, google authentication strategy, and the corresponding types to the project.
npm i passport
npm i passport-google-oath20
npm i -D @types/passport
npm i -D @types/passport-google-oath20
In the src folder, lets create a folder called middlewares and add a file passport.ts.
import passport from 'passport';
import GooglePassport from 'passport-google-oauth20';

// This is abstracted from the process.env and stored in a file called constants
import {
  GOOGLE_CALLBACK_URL,
  GOOGLE_CLIENT_ID,
  GOOGLE_CLIENT_SECRET,
} from '../constants';

const GoogleStrategy = GooglePassport.Strategy;

// These are the interfaces for the Auth  User and Email
interface IOauthEmail {
  value: string;
  verified: boolean;
}

interface IOauthUser {
  id: string;
  emails: IOauthEmail[];
  name: { familyName: string; givenName: string };
  provider: string;
}

// This function normalizes the profile Object gotten from Google
const userProfile = (profile: IOauthUser) => {
  const { id, name, emails, provider } = profile;

  let firstName;
  let lastName;
  let email;

  if (emails && emails.length) email = emails[0].value;
  if (name.givenName) firstName = name.givenName;
  if (name.familyName) lastName = name.familyName;

  return {
    id,
    firstName,
    lastName,
    email,
    provider,
  };
};

passport.serializeUser(function (user: any, done) {
  done(null, user.id);
});

passport.deserializeUser(function (id: any, done) {
  done(null, id);
});

passport.use(
  new GoogleStrategy(
    {
      clientID: GOOGLE_CLIENT_ID,
      clientSecret: GOOGLE_CLIENT_SECRET,
      callbackURL: GOOGLE_CALLBACK_URL,
      scope: ['profile', 'email'],
      passReqToCallback: true,
    },
    (_req: any, _accessToken: any, _refreshToken: any, profile: any, cb: any) =>
      cb(null, userProfile(profile))
  )
);
To learn more about the passport serializeUser and deserializeUser functions, visit this link
Setup Server
In our src folder, create a file index.ts
import 'dotenv/config';
import express from 'express';
import helmet from 'helmet';
import passport from 'passport';

// Import  Routers
import authRouter from './routes/authRouter';
import homeRouter from './routes/home';

// Require Passport midleware - without this your app wont work
require('./middleware/passport');

const app = express();

// App middlewares
app.use(express.json());
app.use(express.urlencoded({ extended: true }));
app.use(express.json());
app.use(helmet()); // Helmet helps secure our http headers

app.use(passport.initialize());

app.use('/', homeRouter);
app.use('/api/auth/google', authRouter);
app.use('/api/auth/google/callback', authRouter);

const PORT = process.env.PORT || 3000;
app.listen(PORT, () => console.log(`App Listening on port ${PORT}`));
Next, we set up our routes and controller to manage the auth process. In our src folder, create a new folder called routes, and a file authRouter.ts
import express from 'express';
import passport from 'passport';

import { handleGoogleAuth } from '../controller/authController';

const authRouter = express.Router();

authRouter.get(
  '/',
  passport.authenticate('google', { scope: ['profile', 'email'] })
);

authRouter.get(
  '/callback',
  passport.authenticate('google', { failureRedirect: '/' }),
  handleGoogleAuth
);

export default authRouter;
In the src folder, create a folder called controllers and add a file authController.ts
import { Request, Response } from 'express';
import jwt from 'jsonwebtoken';

import { JWT_SECRET } from '../constants';

// This function manages the google authentication from the callback route
export const handleGoogleAuth = async (req: Request, res: Response) => {
  // Handle req.body validation and return 400 error if validation failed

  // Then check if user exists in Database

  // If user does not exist, create new user and return token
  // The code below shows only how to return token and user object from Google
  try {
    if (req.user) {
      const token = await jwt.sign(req.user, JWT_SECRET);
      const responseObject = {
        token: token,
        ...req.user,
      };
      res.send(responseObject);
    }
  } catch (error) {
    console.log(error);
  }
  // If user exists, find user, create token, and send to client
};
And that's it! Our server is ready to log in users. To test your application, start the server and visit http://localhost:3000/api/auth/google on your web browser. You will be prompted to log in with your Google account.
After login, the callback URL will be activated and you should see a response like the one below - an object with the jwt token and user details.

Due to the nature of the JSON web tokens(JWT), logout functionality is handled by the client.
You can find the GitHub repo for this project here